Art & Books: March 2004 Archives

Completely Out of Control

| | Comments (3)

While I was out running errands (buying host gifts for our visit to the UK next week), I stopped by the Art Store and bought a silkscreen kit. Which is ridiculous, if only because I'm definitely not going to have time to use it before we leave on Friday, especially as I have a bunch of printing I need to do for photography. But I bought it and now I can take it out and paw over it.

I also bought miniature Cadbury Creme Eggs, which I cannot pretend I am bringing to England with me.

By Popular Demand

|

I give you: Djack!

Djack

Nostalgia Out of Control

|

Last week in photo lab I worked on some old negatives I found while decluttering. You can see three of the resulting images on viewfinder.

I did a lot of photography in high school and stopped abruptly in my second year of college. Maybe more of my overprotective need to let my brother be the photographer in the family (as if only one of us could love something at a time). So it was like a little time capsule when I opened a notebook and found page after page of negatives from various trips and moments spent with friends. A lot of them I just threw away -- pages of photos of track meets and cross-country races. Not only were most of the photos bad, but even the good ones didn't matter to me any more. I haven't seen or heard from any of those people in ages.

What was kind of interesting were the photos that popped up every now and then: these beautiful encapsulations of how I was feeling at a given moment. I put three of them up so I could explain them.

First, we have Dream of Wheat.

In 1989, I went on an exchange program to France. I didn't know it then, but that was the beginning of the loneliest year of my life. I was basically despised by the youngest daughter of the family I stayed with (the 15-year-old who was having unprotected sex with her 22-year-old boyfriend in Paris), so I spent a lot of time walking the family dog, Djack, along the paths through the wheat fields outside of town. Someday, Rosie will be as good for walks as Djack was.

Then there's Iguacu.

In the summer of 1990, my mother took me with her on a month-long trip through Brazil. It was really amazing. Brazil is a huge country, and we visited five cities that managed to be entirely different from one another. Iguacu was our first stop. It's cold there in the winter, and the cheap motel we stayed at had little concept of central heating. I recommend going upscale for hotel accomodations in Brazil.

I took this picture of my friend Teresa and the German exchange student who was staying with her family while I was back in Ithaca on winter break in 1990. (A bummer of a year to be an exchange student leaving Germany for the US, but oh, well.) I didn't realize it at the time, but my friendship with Teresa was slowly fading away. The proximity thing, I think. It just began to seem like we didn't have much to talk about when we saw each other. Last I heard she was running a farm of some sort with her partner, who was in my class in high school.

I have a few more photos from that set of negatives that I want to develop. Some tourist shots from around France, and a few from Brazil (but fewer; most of the Brazil photos I did in colour). It's interesting to see that I was getting quite good negatives out of the old Fuji camera; just as good as the ones I've been getting from the much more expensive and complicated Nikon. It just goes to show you that equipment cannot replace skill.

Mad With Plaster

|

I almost forgot to post about today's little excursion into Plastermania.

Wednesday I set up half the mold form for the first pour: six plastic eggs buried up to their midriffs in clay. Today, after some time spent fussing around and bitching to myself about how other people leave the clay area a mess, I set up the cottle boards and poured the mold. I was able to get both halves poured and cleaned before the guild work time was over.

If you're wondering what the steps are for making a plaster mold for slip casting, they're quite simple.

  1. Find the line. The first set is to find the line on your object where two halves will not make an undercut (undercuts get stuck in the mold). On most cheap plastic toys, this line is really obvious because it will not have been fettled off. You bury the object up to that line in clay, so that one half is sitting above the clay. All angles should be at or very close to 90 degrees; you don't want sharp edges on the plaster. You want to make sure you put on a pouring spout at the same time, or you won't have any way to pour the slip into your mold. I like to make my pouring spout almost perfectly straight. Other people like more of a taper. It should be wider on the outside, but not too narrow anywhere, or a plug will form during casting. For really large objects, you will want to put on a pouring spout and also a draining spout on the other side of the mold, because slip weighs a lot more than you think it does.
  2. Set up the boards around the object. The boards used for mold-making are just 1-by boards that have been sprayed down with WD-40 so they will resist binding by the plaster. The ones we have at school have L-brackets on the ends so they slide together. I've also seen ones with a piece of angle iron along one short end, as a clamping surface. At school we clamp the boards in place (roughly) with clamps, then seal them in place with wads of clay.
  3. Seal the cracks. I put a coil of clay around the bottom of the cottle boards on the inside, then up each of the four joints, and smooth them down completely. I also seal the outer cracks in the corners and along the bottom with clay, although not as completely, because I rely on the quality of my seal on the inside. Because everything you see on the surface of the clay will appear on your mold, I make a real effort to do nice, clean work sealing the cracks. I still have to do some cleanup, but not as much as more sloppy mold-makers will have to do.
  4. Brush on release agent. Some people do this before putting up the board setup, but my hands are small, so it makes little difference to me. We use Purelube's pure soap product at school; at home I usually use silicone as a release agent. Apparently something called "green soap" is the end-all, be-all of release agents; I'll have to try to find some of that sometime. One of the critical things with the release agent is making sure not to allow bubbles to form. Bubbles will appear in the surface of the object, so unless you really want bubbles all over the place, you've got to be super tidy.
  5. Mix the plaster. We mix by volume at school: 10 plaster to 7 water. Makes a decently hard mix and is easier to do than weighing, although weighing is a more reliable method. I put the water in the bucket, then the plaster. The plaster gets mixed in by hand, smooshing the lumps and mixing fairly slowly. You can speed up the cure of the plaster by mixing faster, but I prefer a slower-setting plaster.
  6. Splash on a coat of plaster to make sure the object is covered. I like to do this even though it's not strictly necessary for every object. It's just a few handfuls of plaster splashed on the object to be sure you get all those odd nooks and crannies that might form a bubble and not get molded.
  7. Pour the plaster. Once I finish doing the splash coat, I pour the rest of the plaster into the mold. I knock the sides to release any bubbles that might be in there, and skim off any froth on the top (froth will cure hard and then flake off all over everything, so it's best to get rid of it either at this point or during cleaning). Once the mold is sitting and curing, I rinse the plaster bucket with cold clean water and dump it -- not into the sink. We dump plaster water in a barrel at school. When I do plaster at home I dump it in the back yard and the dog eats it. Chacun à son gout.
  8. Twiddle thumbs. It takes about twenty minutes to half an hour for the mold to be ready to be released. Once it gets really hot, it's set up enough that if you unmold it it will not fall apart and ruin all your work. At that point I scratch the name of the object ("Kitty") and my name on the back using a needle tool. Helpful when you want to find a mold later without having to open them all up (and risk damaging it), and also to identify your molds in a shared studio space.
  9. Unmold the first half. I release the boards, pull off the clay blobs and bits, and turn the mold over. I remove all the clay from the back of the object, keeping it buried face down in the plaster (so the edges will line up properly). If the object comes free, I try to put it exactly where it was, which may or may not be easy.
  10. Clean carefully. With the clay peeled off the surface of the mold, I wash everything down, including the object (which is usually dirtier than the plaster). If it's just unbearably dirty and you don't want to deal with it, you can set it out overnight and all the clay will dry up and be a bit easier to get off, but you're just going to have to wash the sucker at some point.
  11. Cut keys. You'll want to make your mold so it only goes together in one way, so you don't accidentally form a massively misshapen object and waste the time spent casting. So you use a tool rather like a melon baller and scoop out three or so rounded keys on the surface around the object (taking care not to cut into the object, naturally).
  12. Is that pouring spout still attached? This is a good time to make sure you're making both halves of your pouring spout, if you have it coming out at the seam (the usual method).
  13. Replace the boards. At this point I put the boards back and seal them up again, as before. Coils of clay around the edges inside, and in the cracks outside. All smoothed down nicely for clean seams.
  14. Brush on release agent. This time, the release agent has to go on the plaster, as well as on the object. Plaster won't stick to clay very well (which is why we're using it to make the mold in the first place), but it will stick to plaster like nothing else. So you want to make sure that release agent is thoroughly soaked into the plaster. If it dries out while you're working, add more. Also lube up the object.
  15. Mix plaster as above, splash on splash coat, pour the plaster, and wait for it to set. Once the plaster is hot, I once again carve the name of the object and my name on the bottom of the mold. Then as above I unmold the mold and remove all the clay bits.
  16. Pull the mold apart. It should come apart stiffly. If it seems stuck, you might need to tap in the seam with a plastic wedge (lightly!) to crack apart a place where the plaster has bonded to itself. Sometimes a key will get stuck because the release didn't stick to it very well. You can now remove the object and the pouring spout, as well as the clay coils used to seal the mold to the boards.
  17. Wash the mold off. Using a damp sponge, wash the clay residue from both sides of the mold.
  18. Scrape off sharp edges. Using a Surform or Surform-like tool, scrape any sharp edges off the bottom, sides, and top of the mold halves. Be careful not to mess with the edges that will form the seam of the mold. You'll clean those up later. Right now you're just making it so the mold doesn't get plaster everywhere when you set it down. Using a fettling knife, scrape the pouring spout interior so that it is smooth. This will help you later when you are trimming the spouts after a pour. Once you've finished, use the fettling knife to gently knock down any sharp edges on the sides of the mold, where chunks of plaster might come off in the clay. Be careful doing this, as every bit of plaster you take off will mean more seam cleaning later on.
  19. Wash the inside of the mold. If you used an oily release agent, wash the inside of the mold with white vinegar and water to break down the oil. Otherwise, the mold will not be able to absorb slip. I've started doing this step every time I make a mold, even though I don't use an oily release agent. It helps a lot.
  20. Allow the mold to cure and dry completely. This process takes five or so days, or one ride under a kiln for a single firing. You have to be very careful about exposing the plaster to heat. Prolonged exposure to temperatures higher than 200F will make the plaster break down into powder. Not good. If you dry the mold under a kiln, clean it again once you remove it, as all kinds of nasty things will have gotten inside.
  21. Make a cleaning pour. Fill the mold with slip and let it sit for 15-25 minutes, topping up as necessary. After the time is up (less time for smaller molds, more time for bigger ones; the time will determine the thickness of the clay), pour out the excess slip and let the mold sit for four or five hours before unmolding.
  22. Unmold your cleaning piece. The first piece from a mold is bad -- it will definitely have plaster chunks in it somewhere, and it will have some red clay on it, marring the surface. So after making sure the mold is good and doesn't need repair or recasting, break the piece up and throw it away (break it up to prevent somebody from trying to "save" it from the trash and possibly making a bomb in the kiln).

The mold is now ready to be used!

I Can Stop Any Time

|

I'm making my sixth mold in ceramics -- this one is a multple of Easter eggs. I was inspired by the egg-shaped cups at the sushi place we went to last weekend. I bought some plastic Easter eggs and decided to use all of them for the mold because making a mold that makes six of something at once makes making sets faster.

I think I may use the mold to make some cups for the ceramics guild sale. Sets of cups glazed differently but all the same size and shape. Might be quite nice, and it's the sort of thing that sells well. I need to make a foot mold, though: a mold that I can use to add consistent feet to the cups. We have a guild work day tomorrow, so instead of working in the darkroom I think I will spend the day making molds and possibly working on a slab-cup project I've been thinking about. I should find something to use to make a foot mold while I am thinking about it.

My most recent aquisition on the mold mania theme is the arrival of George the Gnome. I didn't know he had a name when I bought him, but he came with a nametag around his neck. Plus his name is scratched into the foot. Interestingly, the mold marks are still on his body and hat, so I can see how to make a 2-part mold for him with no trouble. I had thought he would require at least a four-part mold. I love when people save me work like that.

I'm going to wait until the commercial molds I bought came in before I decide whether to commit to casting George. He's rather large, and the mold might be kind of heavy. Right now he's sitting on my desk, looking somewhat pensively at the monitor. He senses that he may be spending a day face-down in clay sometime soon, and is not looking forward to it.

A Very Interesting Evening

|

Stefanie Herzer, who I mentioned in a previous post, invited me to come visit her in her studio, and offered to lend me some photos for a presentation to my photography class this week. I stopped by at 4pm, and was there until almost 8pm.

First of all, Stefanie is a really nice person. She's very easy to get along with, friendly, helpful. She spent a lot of time talking to me about her business, how she got started (she used to be a programmer, but decided to do something that she loved rather than stick with the field she started out in), who her influences are, and how she's developing her skills as a photographer as she works. She also just lent me a number of mounted prints, and gave me two unmounted prints of my favourite landscapes from her collection.

She mostly does wedding photography, and we talked a bit about the wedding photography business. There's a lot of interpersonal interaction with customers in weddings, and Stefanie seems to do an excellent job of it. While I was at her studio, one customer dropped by, and two others called, and she was calm and professional and everything you would want a wedding photographer to be.

We talked a bit about how photography is perceived as a man's profession, even though a lot of wedding photographers are female. Because we'd both worked in software, we compared stories about competitive coworkers. And because the assignment came out of a desire for the class to see that there are more photographers out there than the most famous men, we talked about how as a photographer, she doesn't have many female role models. It's just a matter of numbers; there are more male photographers in print.

Mostly, we talked about the business of a small business. How she has overhead and expenses to manage, how most photographers barely make a profit, but do it because the work allows them to do what they love, and that's worth it. Stefanie definitely loves what she's doing, and it comes through in everything she says and does. So if you're getting married in the Bay Area (or the West Coast; she travels), look her up.

Some More Photos

|

I posted a couple of the photos I took in the last week, which I developed this morning. I've been working on trying to make my compositions more compelling, to add something to the photo that is more than just something pretty, so you feel like you want to look at it for a while.

I've also been trying to take photos for my series that could stand alone. I like the graffiti series, but when I make contact sheets of the photos I take, I'm never quite sure that they stand up to scrutiny as solo pictures. As a series, they're quite interesting, but alone? Not really. I have dozens of photos of tags, now, and most of them are really not worth developing. Something is missing.

On the other hand, the passages series has really taken off. The best photos from this last roll were for that series, and they have a bit extra to them, something compelling. I think the very animal part of us that is seeking pathways helps with that. I especially like the serendipitous appearance of humans in one of my shots -- I waited for ten minutes for a clear view of this scene, and at the very moment I hit the shutter release, two people stepped out of the shadows into my shot.

It's also becoming clear to me that I need to spend some time shooting somewhere other than on campus or at home, because I've shot most of what I thought would shoot well in both places. Spending half an hour shooting on Laney College's campus was really freeing. Too bad there are so many people around, though. It makes those Cold War industrial emptiness shots hard to catch.

Art in Odd Places

|

Some shots from the phone camera. First, my woodworking class at Laney College:

The guy in the yellow shirt is my teacher.

Then the "Missing Student" installation, on its way to Sacramento for a rally, in the courtyard of the arts building at City College:

The statues are cast fiberglass in a couple of body shapes, about 4 1/2 feet tall, and painted by various students in keeping with the rally's message: that thousands of California community college students will not be able to return to classes if they raise tuition from $18 per credit (for everyone) to $26 per credit ($50 per credit if you have a bachelor's degree).

Check This Out

|

I'm working on my research project for my photography class right now -- I have to find a photographer who is like my assigned partner in the class, do some research on him or her, and make a presentation to the class.

My assigned partner is 23, from LA, and female. Finding a young female photographer is a real chore, but I came upon Stefanie Herzer, a San Francisco photographer who has done Burning Man a couple times and also does weddings and portraits. Check out her landscapes; the way she captures light is really amazing.

Fun With Toxic Chemicals

|

I spent five hours in the darkroom today.

First I walked around campus taking pictures for my series of photos of graffiti in context. I found some interesting ones, and made some observations:

1. The best graffiti is located near places where food is sold.

I guess people tag these places so they can remember where they got something good to eat. It does seem odd, but I found a lot of great, artistic tags right near the catering truck and the little snack shack, and the stuff in between was really uninspired.

2. Taggers who use stickers are really lame graffiti artists.

I think a tag on a sticker has to be higher quality than a tag done directly on an object, because the maker clearly had more time to work with it, but usually the tags on stickers are mundane things, while the tags on objects are graceful and free.

3. There's very little graffiti up at the top of steep staircases on a windy outlook.

Apparently, taggers are lazy. That, or they don't take science classes. On the other hand, I found one tag in a lovely location by the Science building, so maybe it's just that the college cleans things up faster up there.

4. Graffiti in bathrooms and other private enclosed spaces is usually about sex.

Maybe it's because it's "shameful," or because it's "private," but for some reason, on this campus, graffiti in public is either tags or political ("Lose Bush"), while graffiti in the bathroom or in the film developing rooms (private darkrooms where you can turn on a white light when you need it) is almost exclusively sexual in nature, and almost entirely made up of people trying to use as many "naughty" words as possible. One piece I saw was basically a stream-of-consciousness list of obscenities.

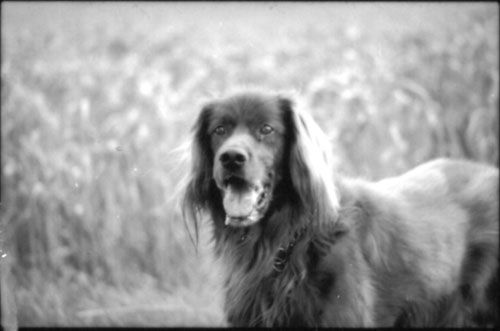
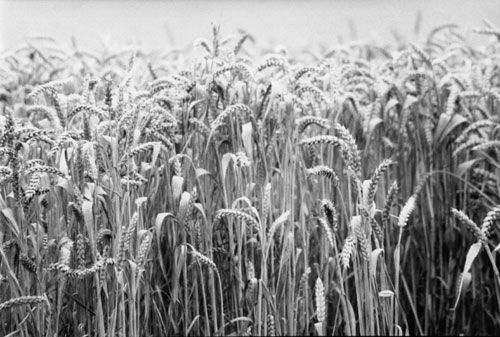
Anyway, I took a whole roll of pictures of graffiti and a few other things, and then developed the film (I misloaded it because I was impatient, and lost four shots to sticking), made contact sheets, and did a whole bunch of prints. Five hours in the darkroom is a really long time. My eyes were really worn out from being around all that fixer and then going from dark to light all the time. It does get easier, but it was still tiring.

More Photo Fun

|

I took Rosie to the park to play today, and took a bunch of photos, of the park and of her, all wet from playing in the water. She was really easily distracted and kept turning her head just as the shutter went, so I'll have to see how the photos came out. I need to shoot the rest of the roll so I can develop it tomorrow after math.

Afterward the park time, we drove over to Berkeley to visit the Looking Glass, a photo supply place. I was looking for a 4x5 developing tank (I chose a Yankee Agitank because it seemed to be the cheapest thing that did what I wanted, and price was an issue; I don't want to possibly have to abandon an expensive developing system at airport security because they don't understand what it is and it looks menacing) and a loupe, and I was also going to get some 4x5 film. All missions accomplished. I also wanted to find a copy of the textbook for my photography class, but no luck; I'll have to go on reading the one in the library. I don't want to pay full price; that's ridiculous when we have two excellent books on photography already. (I also was hoping to see something about large format photography, but there was a large guy in front of the book shelves, so I was unable to peruse as freely as I would have liked.)

I ran into two of my classmates while I was at the store, which was kind of funny. It is a teeny-tiny world we live in. (I also ran into my old friend Sharon downtown in San Francisco when Noel and I were going to meet the Subversion people for dinner. It was that kind of day.)

Now that I can focus and have film to load in the camera, I'm going to take some photos with the Graphlex this weekend. I want to get comfortable enough with it that I don't have to worry about learning how to use it when we're in the UK. First I'm going to need to sacrifice some film to get comfortable with loading the film holders and the developing tank. That should be a laugh riot.

The Casa Decrepit Book Club

|

Noel asked me to recommend a book a month for him to read, so he can broaden his horizons. After some discussion of whether he wanted a clasical education in literature or just interesting stuff to read, we modified that to one non-fiction, and one classic fiction book a month. Last month's selections were:


  • Dead Souls by Nikolai Gogol. This is a funny any also significant piece of Russian literature. Set late in the Empire, it tells the story of a man who wants to appear to be rich so he can court a particular girl, so he's going around buying the tax burden of the souls of dead serfs from landowners, who are suspicious of him, because they would otherwise have to pay a tax on those dead serfs until the next census, and why does he want to buy dead souls, anyway?

  • The Book on the Bookshelf by Henry Petroski. An excellent history of the form and storage of books through history.


While he has not (ahem) managed to finish those books yet, on account of not starting to read them until last night, I'm working on his selections for March. I'm thinking:

  • Great Expectations by Charles Dickens. My favourite Dickens, it's the story of Pip and how everybody has great expectations of him, and he gets a bit of a stuffed head because of it.

  • Trading Up by Michael Silverstein and Neil Fiske. A business book on trends in consumer spending.


Maybe he'll get to those before it comes time to make the April selections.

About this Archive

This page is a archive of entries in the Art & Books category from March 2004.

Art & Books: February 2004 is the previous archive.

Art & Books: April 2004 is the next archive.

Find recent content on the main index or look in the archives to find all content.

Pages

Powered by Movable Type 4.12